Yoga not only aids in achieving harmony and purging the mind of unneeded ideas, but it also strengthens the body. People who practice yoga frequently could be mistaken for gym regulars. For instance, the actor, musician, and artist Jared Leto regularly does yoga and is known as a man who never ages.Some advice and asanas that we’ve compiled can help you get more out of your yoga practice.
Preparation
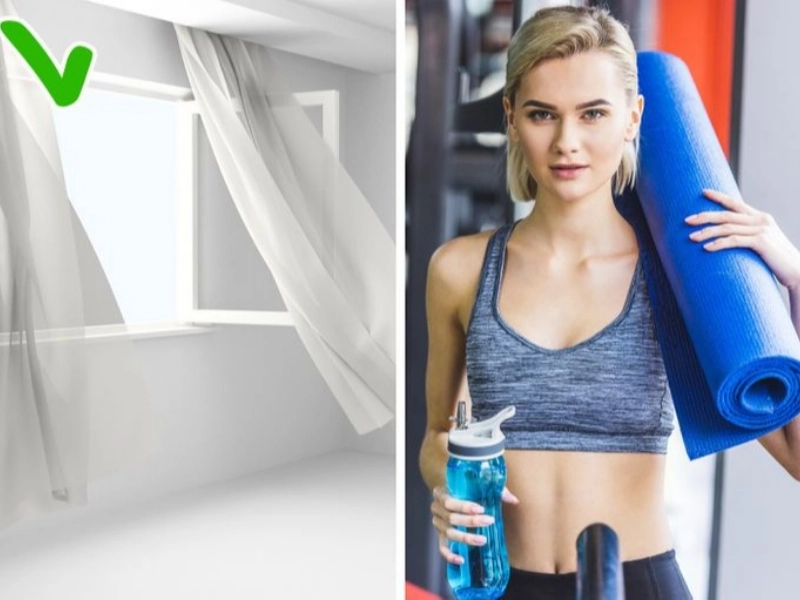
You must get ready in order to perform yoga. The following is a list of considerations and preparations you should make before beginning your yoga session:Yoga should be practiced in a calm and tranquil environment, away from anything that might disrupt the flow. When practicing indoors, the space must have adequate ventilation. Yoga requires fresh air, so it’s best to stay away from drafts.Free-fitting clothing made of natural fibers that allow the skin to breathe is ideal. The stomach shouldn’t be full when the workout begins. Additionally, you should drink a modest amount of water and, if feasible, empty your intestines and bladder. It is advised to start sessions an hour or so after a small meal. However, it is preferable to work out on an empty stomach if at all possible. Clean water should be placed next to you during class, and you should occasionally sip from it as you transition between postures. Eating right after class is not permitted under any circumstances. Before eating, you must wait anywhere from 20 minutes to an hour.Yoga mats should be dense and thick enough, but not elastic or soft, so that there are no abrasions or bruises on the body’s solid parts when they come into contact with the floor. The surface on which you will practice yoga should be flat and sturdy. In order for a person to fit on the mat while stretched out on the floor, the mat’s dimensions must match the size of the body. It is advised to use a rubber yoga mat when performing yoga.
Breathing
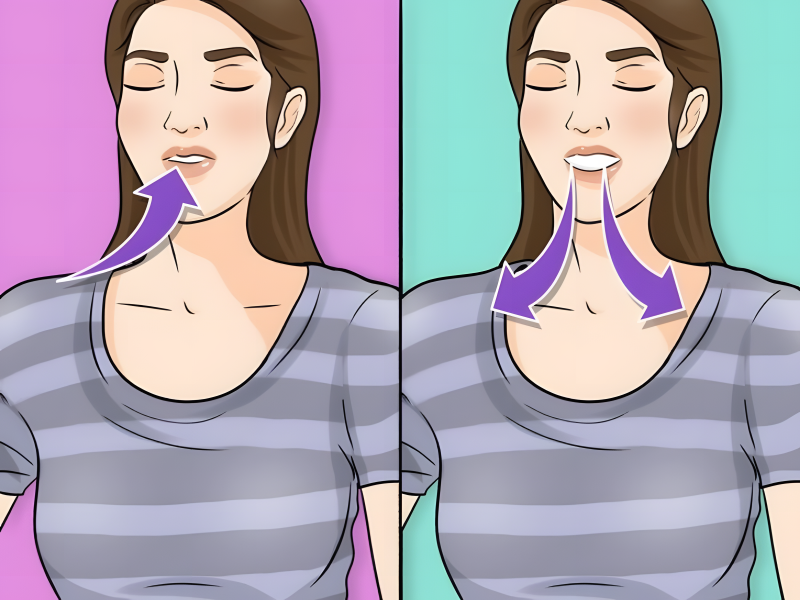
While practicing yoga, proper breathing not only enables you to get the intended results from the asanas but also aids in the development of a unique meditative state.Several considerations should be made:Use only your nose to breathe.Make the diaphragm active. The muscle that divides the thoracic and abdominal chambers is called the diaphragm. The volume of the lungs increases during inhalation and contracts again during exhalation. It’s not always easy to achieve diaphragmatic breathing on the first try. Simple exercise is beneficial. Bend your knees while lying on your back, placing one hand on your chest and the other on your stomach. Breathe in such a way that the hand on your stomach rises with each inhalation and lowers with each exhalation, while the arm on your chest stays still. Deeply inhale and exhale slowly.Keep the rhythm going. There is a particular breathing rhythm that is present when changing asanas. The main rule is that downward motions (bending, rounding the back) should be performed on an exhalation, while ascending motions (raising the arms, straightening the spine, bending) should be performed on an inhalation. Breathing should continue during yoga’s static asanas. It is worthwhile to use each breath to loosen yourself a little bit more and sink deeper into the pose.
Simple power yoga poses and asanas
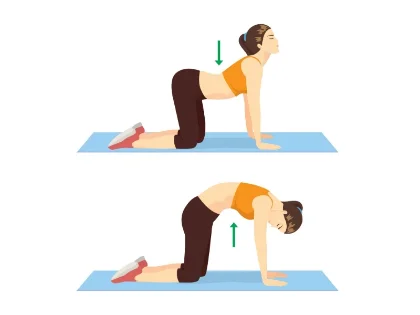
1. Cat/cow

Step one: Get down on all fours. Knees should be together or under the hips, and palms should be strictly under the shoulders. In order for the rest of the fingers to point slightly to the sides and the middle fingers to face forward, the hands’ fingers should be slightly spaced apart. To avoid putting weight on the toes, the feet should be pointed backward and the ankle should be flat on the ground. Thumbs should be crossed, heels should be apart, and knees should be together rather than above the hip joints. When you inhale, squat to the floor with your back bent, stretch your neck upward, and push your head back while not “wringing” your neck. Exhale while bringing your head toward your chest and lifting your back into a “hump.” Your hands must always be held straight up. Put your body in a straight position and lie down.
2. Downward-Facing Dog
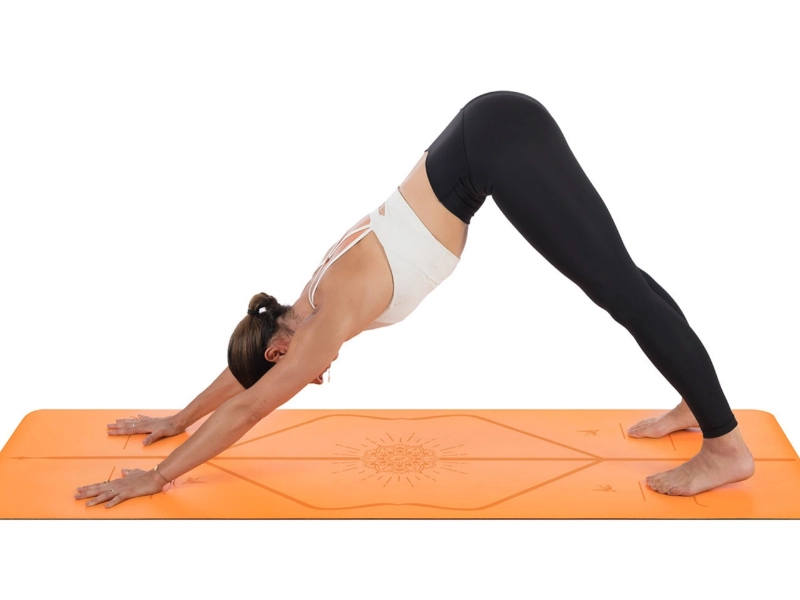
Technique:While on all fours, place your palms shoulder-width apart with your fingers pointing forward. The distance between your knees and feet should equal the width of your shoulders. Your hips and arms ought to be parallel to the ground. Flex your lower back. Lift the buttocks backward and upward as you exhale, pushing your hands off the ground. Increase the internal space in each joint by extending the arms and back in a straight line. Knees should be straight, and heels should be pressed into the floor. Hold this position for one minute.
Features:Imagine creating a mountain in the coccyx that has two slopes and a peak. Make an effort to make the slopes and peaks more acute. Throughout, press your hands firmly into the ground.The middle fingers should be extended, the palms should be flat on the floor, and the other fingers should be splayed out to the sides.The feet ought to be flat on the ground and parallel. The toes should be spread apart.The hips should be “wrapped” inside, the legs should be straight, and the buttocks should “unfold” outward.Stretching the hips should be done with the chest.The loins ought to sag.The coccyx should extend upward.The abdomen ought to be lengthened.This position is beneficial for getting rid of exhaustion and regaining lost energy. In essence, it is helpful for athletes who need to recover from a race. The position encourages the softening of salt spurs, relieves pain and stiffness in the heels, and gives the legs a feeling of lightness. Additionally, it strengthens the ankles, shapes the calf muscles into a lovely outline, and lessens the discomfort caused by arthritis in the shoulder joints.
3. Revolved Triangle Pose
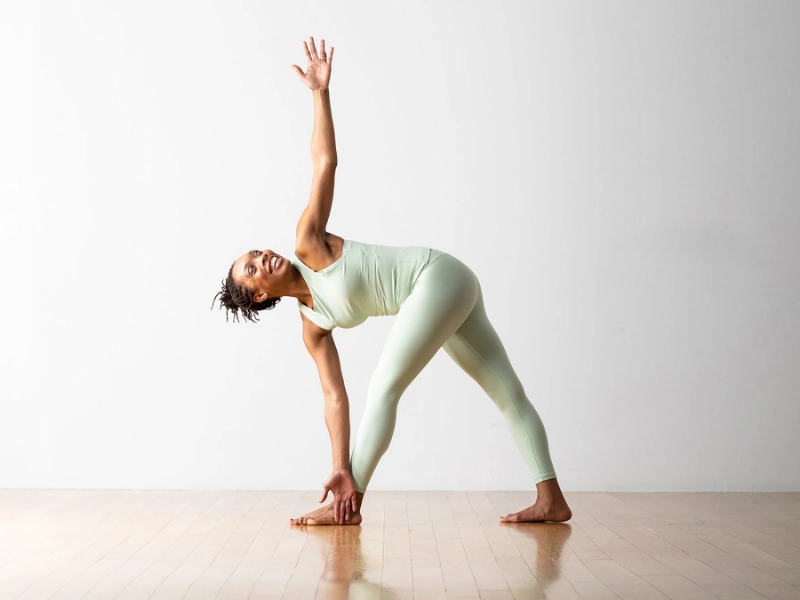
Technique: Spread your feet out to a distance of about one meter and extend your arms out to the sides, palms down. Expand the left foot to 45° in the same direction as the right foot, and vice versa. Pull both sides upward as you inhale, then bend to the right and place your right hand at the outside of your right foot or lift your right foot as you exhale. Widen the thorax by raising the left hand. Stretch your neck, lengthen your spine, and keep your eyes on your left palm throughout. Take accurate 20–30-second breaths. Then, as you take a breath, stand up and repeat in the opposite direction. Make an effort to arrange the body similarly.This pose strengthens the knees and ankles, develops pelvic joint mobility, and opens the chest while toning the muscles in the legs. Additionally, it encourages weight loss and corrects any leg abnormalities. Additionally, it eases neck and back pain.
4. Warrior I Pose

The Warrior I stance utilizes your abdominal muscles as well as your feet, hamstrings, quadriceps, and gluteal muscles.Technique:Stretch your hands upward and join the palms together. Place your feet 120 to 130 centimeters apart after taking a deep breath. When turning to the right, 90 degrees to the right with the right foot, and a minor turn to the right with the left foot, exhale. Right leg: Bend the knee such that the femur is parallel to the floor and the shin is perpendicular to the ground. There should be a straight angle between the calf and the thigh. Extend the left leg while contracting the knee muscles. While extending your spine, focus on the interlocked palms. Keeping your respiration quiet, hold this position for 20 to 30 seconds.
5. Warrior II Pose
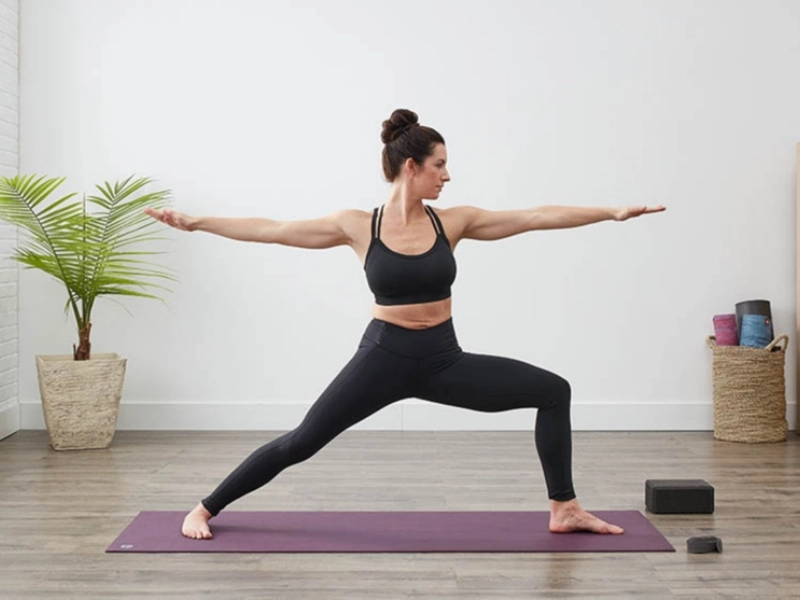
Technique: With your arms stretched out to the sides at shoulder height and your palms facing down, position your legs 120 to 130 cm apart as you inhale. Turn the left foot slightly inward while rotating the right foot 90 degrees to the right. The legs should remain straight. Breathe in deeply. Bend the right leg at a 90° angle while exhaling. The left eye should be focused on the right palm while you turn your head to the right. The last slot is this one. Stay in this position for 20–30 seconds while breathing normally.Keep the following things in mind:Lengthen the chest. Both hands should be extended to the sides in opposing directions. Firm up your buttocks.
6. Warrior III Pose
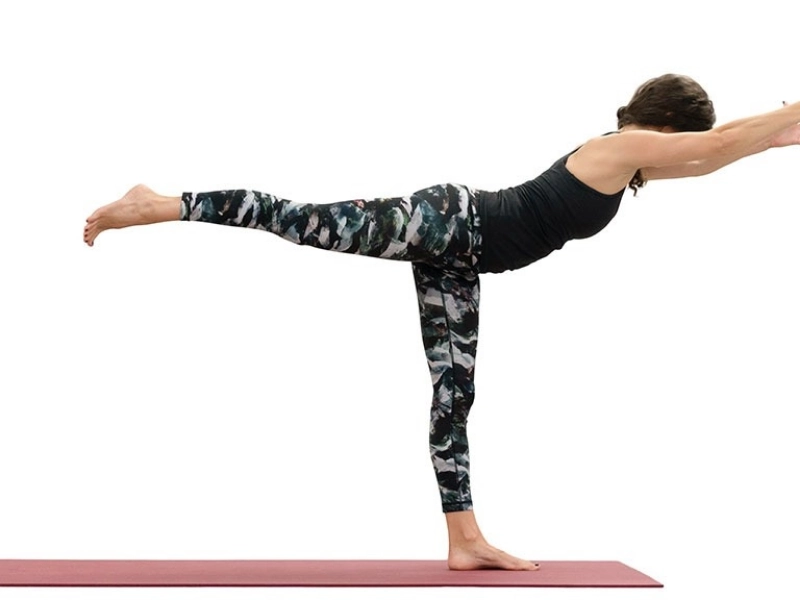
Technique: Take a deep breath and space your feet 120–130 cm apart. Bring your hands up so they are parallel to your shoulders. Take a deep breath, bend forward, and rest your chest against the right leg’s thigh. Maintain straight hands with the palms touching. Hold the posture for some time. Take a deep breath, lift your left leg, nudge your body a little forward, straighten your other leg, and slowly lower it down. As soon as the front surface of the left leg is parallel to the floor, it should be bent inside. Hold this position for 20 to 30 seconds while taking slow, deep breaths.Keep in mind that the body must be parallel to the floor, with the exception of the supporting leg.
7. Eagle Pose
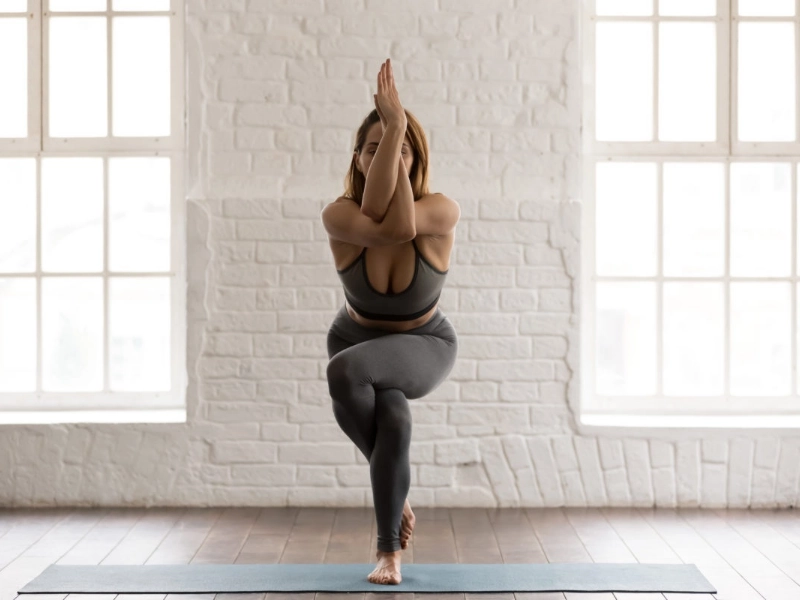
When taking this stance, it’s important to keep a few things in mind. Press the supporting foot firmly to the ground, lean more firmly on the big toe of the upper leg, and concentrate on any point in front of you to keep your balance. From the crown to the coccyx, extend your back.Technique:Remain upright. Raise your right leg and encircle your left leg, placing your right foot’s big toe on the sole of your left foot. With your fingers pointing up, join the palms of your right and left hands by placing the right humerus on top of the left. Lower the body as low as you can while maintaining balance. Hold this position for 15 to 20 seconds, preferably longer. Take deep, steady breaths.