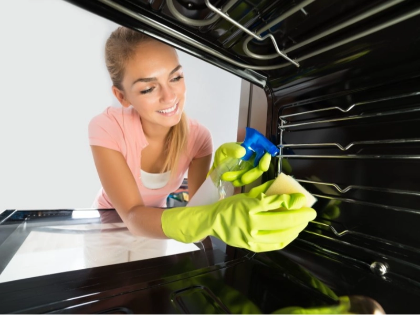
5. Step-by-Step Guide to Applying the Dishwasher Tablet
It’s time to use the dishwasher tablet cleaning approach now your oven is ready. Start by safeguarding your hands with your rubber gloves. To activate the cleaning ingredients in a dishwashing tablet, dip it just momentarily in warm water. As you want the tablet to stay generally firm, be careful not to submerge it for too long. Squeeze gently any extra water out. Working in circles, use the moist tablet as a scrubber starting with the oven door to cover the whole surface. As the tablet gets into touch with the grease and dirt, it will start to froth. Give especially unclean areas more attention and, if necessary, increase your pressure. After you have addressed the door, work inside the oven. Working systematically from top to bottom, make sure you cover all surfaces—including the sides, rear, and oven bottom. The tablet will steadily disintegrate while you scrub, releasing its cleaning ingredients. Start with a fresh pill if yours gets too small to manage. Make sure to reach into cracks and corners where grease likes to gather. Should you come across particularly tough stains, let the tablet’s foam linger on these areas for a few minutes before returning to clean. Proceed this way until the door and the oven’s whole inside has been covered. The aim is to produce an even, thin layer of foam covering every surface. After completing the dishwashing tablet solution application, let it operate for roughly 15 to 20 minutes. The cleaning chemicals’ dwell duration lets them pierce and dissolve the hardest dirt.
6. The Crucial Rinsing and Wiping Process
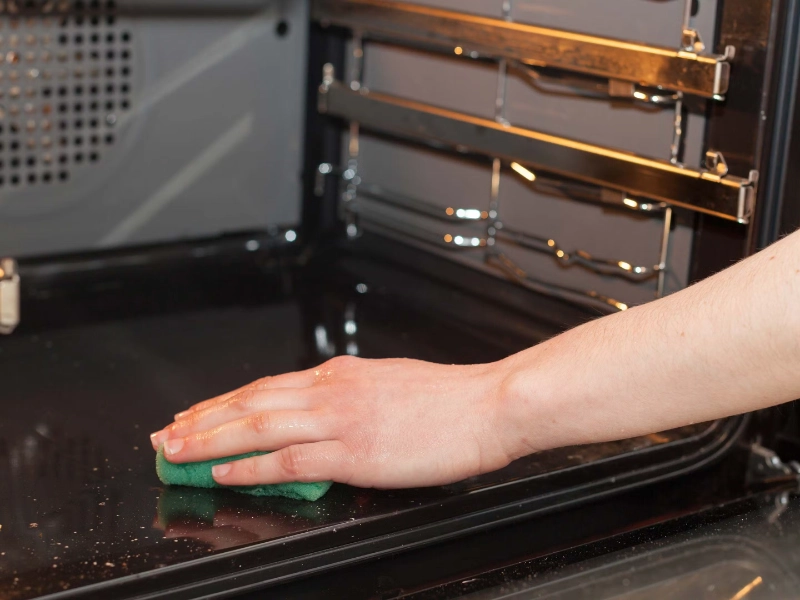
It’s time for the vital rinsing and wiping once the dishwasher tablet solution has been permitted to work on the surfaces of your oven for 15 to 20 minutes. Eliminating the loosened filth and cleaning solution residue requires this stage, which will leave your oven looking brand new. First, load a spray bottle with warm, clean water. Start with the oven door and mist the foaming surfaces liberally with water. Wipe the foam and dissolved filth with a fresh, moist cloth or sponge. To prevent spreading the filth, rinse your cloth often in fresh water. For tough spots, you might have to spray and wipe several times. Proceed now inside the oven, once more from top to bottom. Focus especially on crevices and corners where residue might gather. Should you come across very tough areas, a plastic scraper can be gently used to lift the softened grime without scrat. As you rinse and wipe, you will probably have to change your rinse water many times to make sure you are not redepositing dirt onto pristine surfaces. After you have completely washed every surface, dry the oven inside and door using fresh, dry microfiber towels. This stage is crucial since it guarantees that any last residue is removed and helps avoid water marks. To keep the oven door seal effective, pay great attention to it and gently clean and dry it. To let any last moisture evaporate entirely, finally leave the oven door open for one hour or so. A really clean oven depends on this exhaustive washing and drying procedure, which also helps to avoid any cleaning solution residue from compromising the taste or smell of your meal when you next run the device.