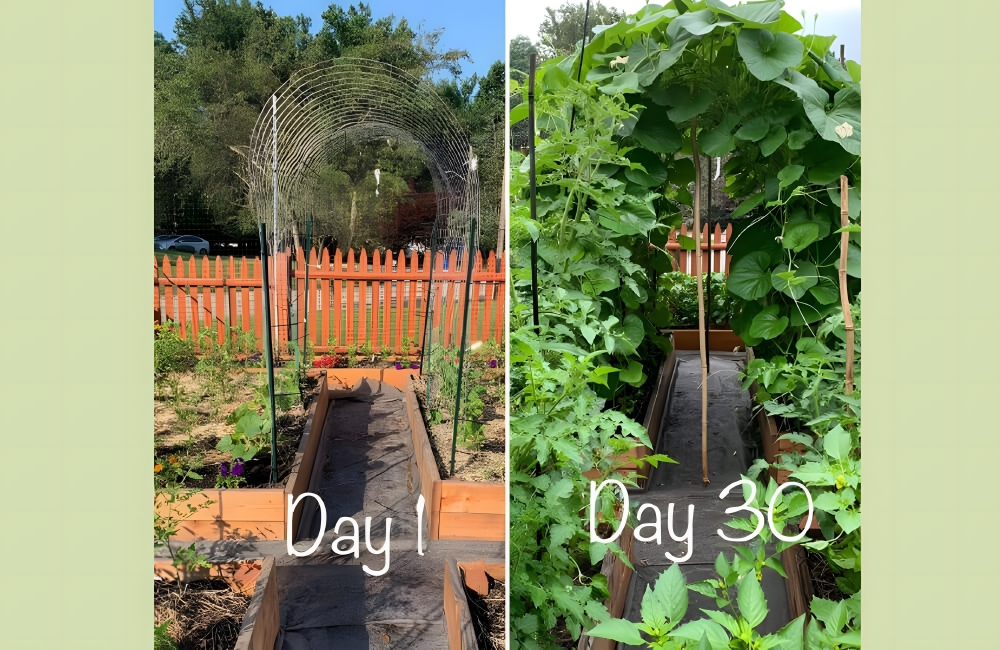
61. Create a Tunnel with Vegetable Vines
Materials Needed: Wire awning, gourds, or other vine-growing plants
Cost to Make: $100*
This amazing-looking tunnel would be a nice addition to any garden. The person whose garden is featured in this photo first constructed an awning out of wire. If you’re not handy, you can always buy a similar awning from Home Depot or Lowe’s. The garden-owner then planted gourds along the awning’s edges.
Create a Tunnel with Vegetable Vines @vanessacrafting / Pinterest
The gourds’ vines trailed upwards and over, creating somewhat of an arbor. It only took thirty days to get nice, leafy vegetation going. If gourds aren’t your thing, you can also plant green beans, peas, or any other plant that has long vines or tendrils.
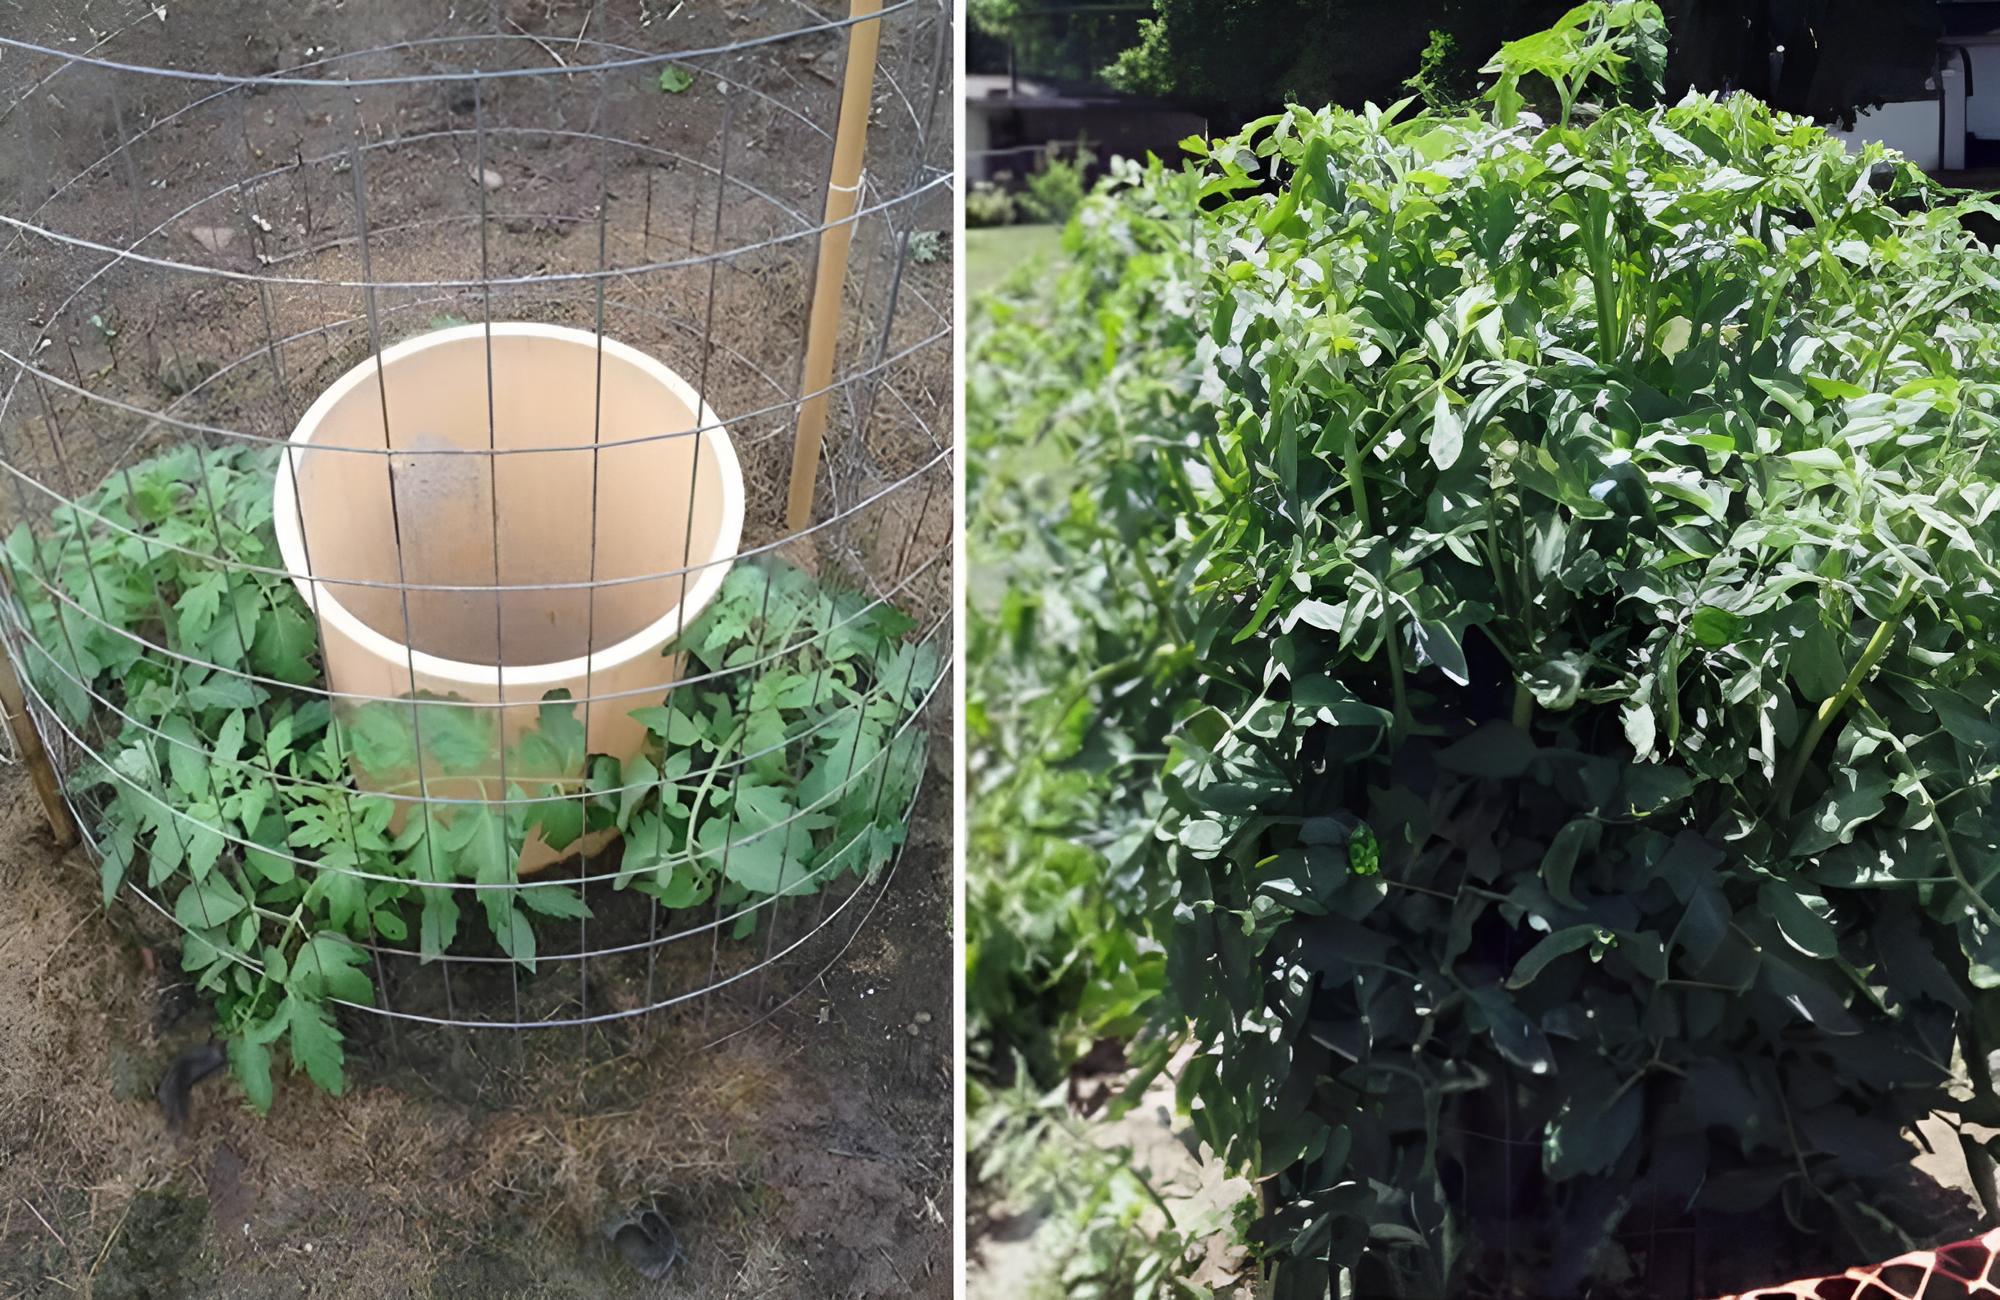
62. Water Your Tomatoes the Right Way
Materials Needed: Garbage can, drill, water, compost
Cost to Make: $20* (Minus Drill)
Tomatoes are a garden staple, but they can be difficult to grow in dry climates. Though watering is key, using an overhead sprinkler isn’t always best for tomatoes’ leaves. The solution is actually quite simple and inexpensive. First, take a garbage can and drill holes in the bottom rin and a row ten inches above the bottom.
Water Your Tomatoes the Right Way @kathrinweigeltk / Pinterest
Bury the garbage can so that the top holes are barely above the ground. Plant your tomatoes around the garbage can. Add two shovels of compost into the can, and fill the can with water every two days. Avoid watering the leaves around the can, and watch the fruit grow.
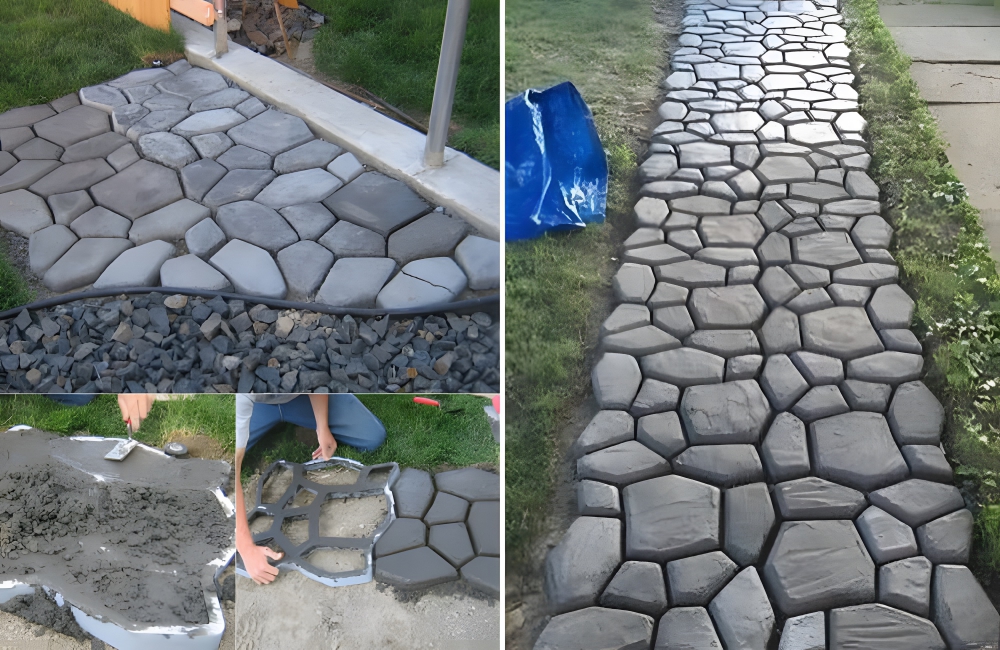
63. Make Your Own Cobblestones
Materials Needed: VanSmaGo Walk Maker Cobblestone Mold, pre-mixed concrete
Cost to Make: $30*
Cobblestones are a chic addition to any garden, and they really bring your whole backyard together. You can make your own cobblestones by purchasing this VanSmaGo Walk Maker Cobblestone Mold on Amazon for $25.99 (one-pack). The paving mold is ideal for a serious DIY-er who is comfortable using pre-mixed concrete.
Make Your Own Cobblestones @vanessacrafting / @yolaimi / Pinterest
The heavy-duty plastic mold turns pre-mixed concrete into a neat pathway of stepping stones. You can purchase the concrete at Home Depot for $7.20 per quart. By comparison, Lowe’s sells pre-mixed concrete for $4.78 for an eighty-pound bag. All you have to do is add water and pour.
64. Kill Grass with Cardboard
Materials Needed: Cardboard sheets, mulch or compost
Cost to Make: $20*
Converting your lawn into a planting bed doesn’t have to require hours of back-breaking shoveling. Instead, all you need are a few sheets of cardboard. Cover the grass you want to turn into a low-maintenance bed with cardboard sheets. Arrange the sheets like shingles.
Kill Grass with Cardboard © Aleksandr Bryliaev/stock.adobe.com
Then, place four to six inches of mulch or compost over the cardboard. Water the entire area until it has been compact. Wait for two months, and then remove the cardboard. You’ll find that the ground has taken on the necessary nutrients and social structure required to grow decorative plants or fruits and vegetables.
65. Use Sponges for Healthy Plant Hydration
Materials Needed: Cut-up sponges
Cost to Make: $5.19 per six-pack*
As gardeners, we’re always looking for ways to keep our plants healthy and hydrated—but not too hydrated, as water that settles at the bottom of planters will cause root rot. To avoid root rot, cut up sponges and line the bottom of the pot with them.
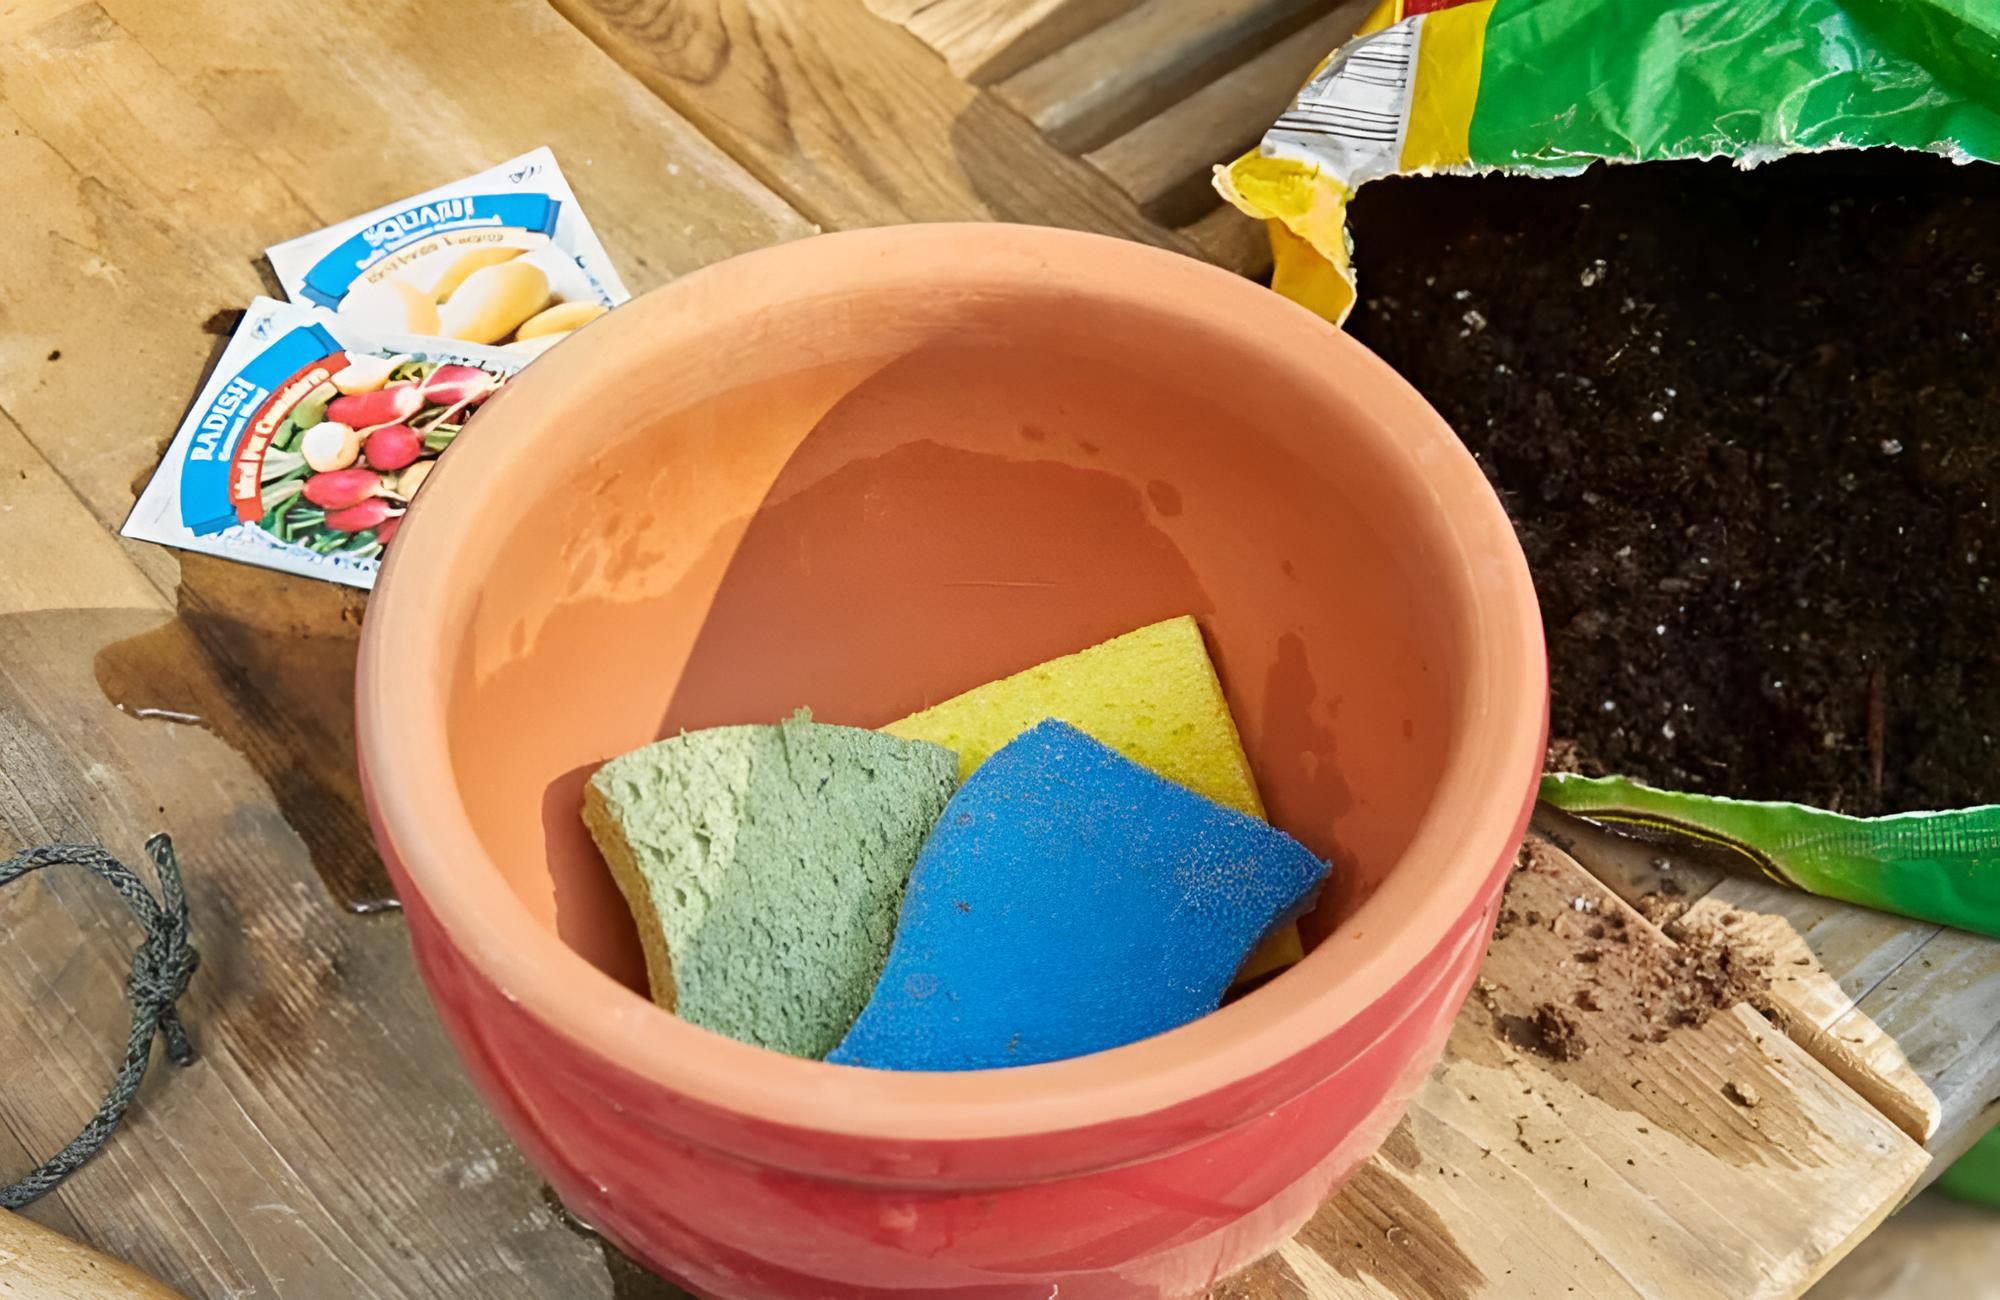
Use Sponges for Healthy Plant Hydration @smlantern50 / Pinterest
These sponges will retain moisture while still creating air space. The sponges will also prevent water from flushing the bottom of the pot. The cut-up sponges act as water reserves, keeping the soil moist for longer without endangering the roots of the plant. For a six-pack of Scotch Brite Sponges, you’ll pay just $5.19 on Amazon.
66. Make Your Own Seed Tape
Materials Needed: Seeds, toilet paper, water from a spray bottle
Cost to Make: $15*
You could go on Amazon and buy seed tape for $10-$15, but why pay that much when you can just DIY it at home? Seed tape is a good way to conveniently plant a lot of seeds, such as carrots, quickly and neatly.
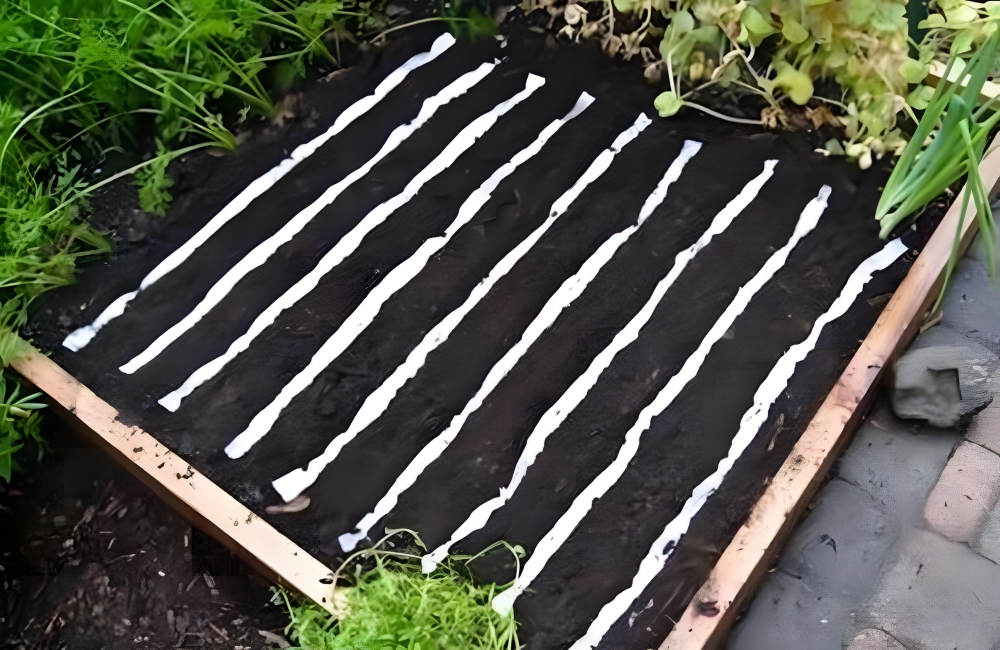
Make Your Own Seed Tape @babem / Pinterest
To create your own, roll out toilet paper and mist the paper with water (use a spray bottle to avoid soaking the delicate paper). Line up your seeds on the paper, keeping them an appropriate distance from one another. Fold one-third of the toilet paper over the seeds, and mist the paper with water to make it stick. Fold the other third over and mist again. You can roll this seed tape back onto the toilet paper tube until you are ready to plant.
67. Cardboard Seed Tubes
Materials Needed: Toilet paper or paper towel tubes, soil, seeds
Cost to Make: $5-$10*
Instead of throwing your toilet paper and paper towel tubes in the trash, you can use them as a simple, eco-friendly way to start seeds. Cut each of the tubes into two-inch lengths, and place the tubes into a waterproof tray. Fill the tubes with soil, and then plant the seeds.
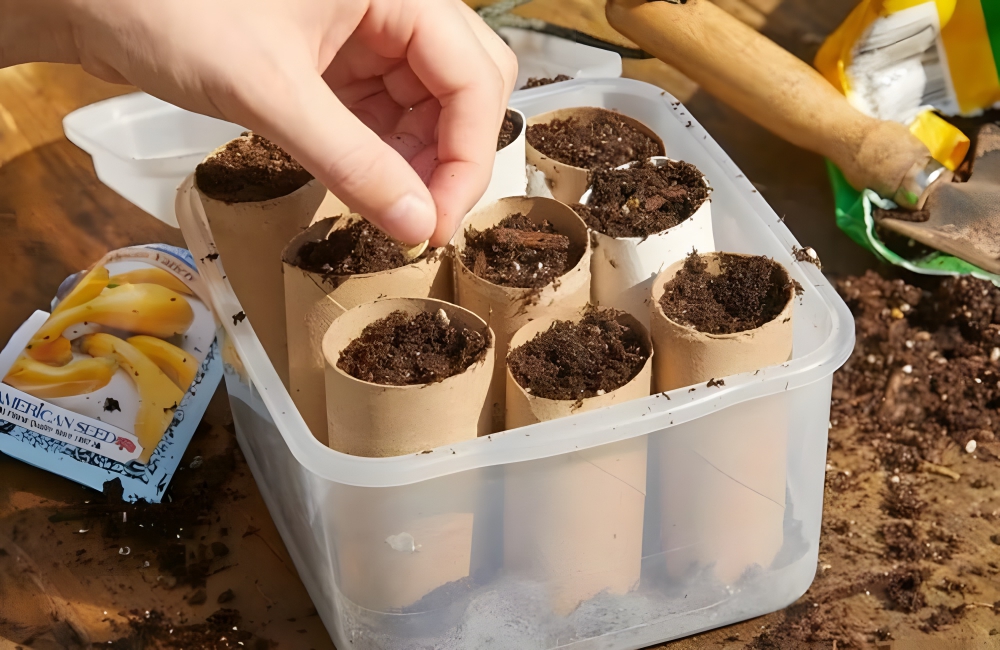
Cardboard Seed Tubes @luvfurbbs2 / Pinterest
When you’re ready to move the seedlings to the garden, you don’t have to take them out of the cardboard tube. Just plant the tube into the ground, as the tube will decompose. However, make sure you keep the cardboard tube beneath the surface of the soil. Otherwise, it will wick away moisture from the seedling’s roots.
68. Fertilize with Straw Bale
Materials Needed: Straw bale
Cost to Make: $8.48 per 80-square-foot bale* (Lowe’s)
A cheap, easy alternative to fertilizer is straw bale. Straw bale can cost as little as $8, and it provides necessary nutrients to plants as they decompose. Though straw bale provides a lot of nutrients, you’ll still need to fertilize plants with a garden fertilizer that has potassium, micronutrients, phosphorus, and nitrogen.
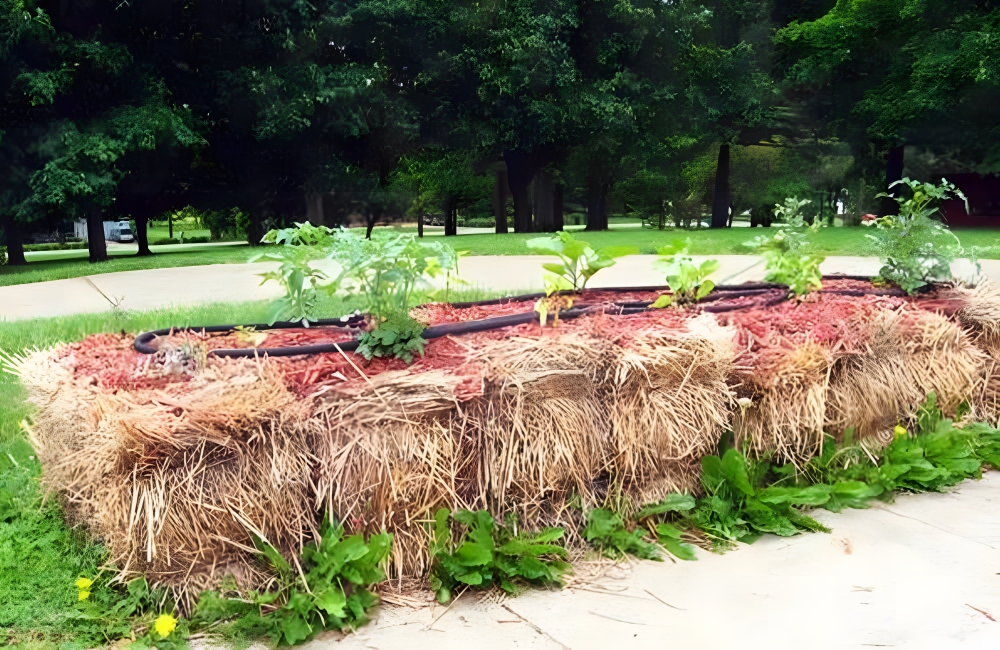
Fertilize with Straw Bale @bobvilahome / Pinterest
In addition to being cheap, straw bale is also easy to maintain. It is pretty much weed-proof, so you won’t be stuck pulling weeds for hours. The bale also doesn’t need as much watering as soil, saving you time and energy while you grow all your summer favorites, from strawberries to tomatoes.
69. Use K-Cups As Seed Starters
Materials Needed: Large, flat container, used, clean K-cups
Cost to Make: $27.35 per 96-pack of new K-cups* (Amazon)
K-cups are a necessary part of life for a lot of us, especially those of us who work from home and don’t want to spend $5 on expensive coffee from Starbucks every morning. But, what can you do with your old, used K-cups? If you have a green thumb, you can do a lot, as it turns out.
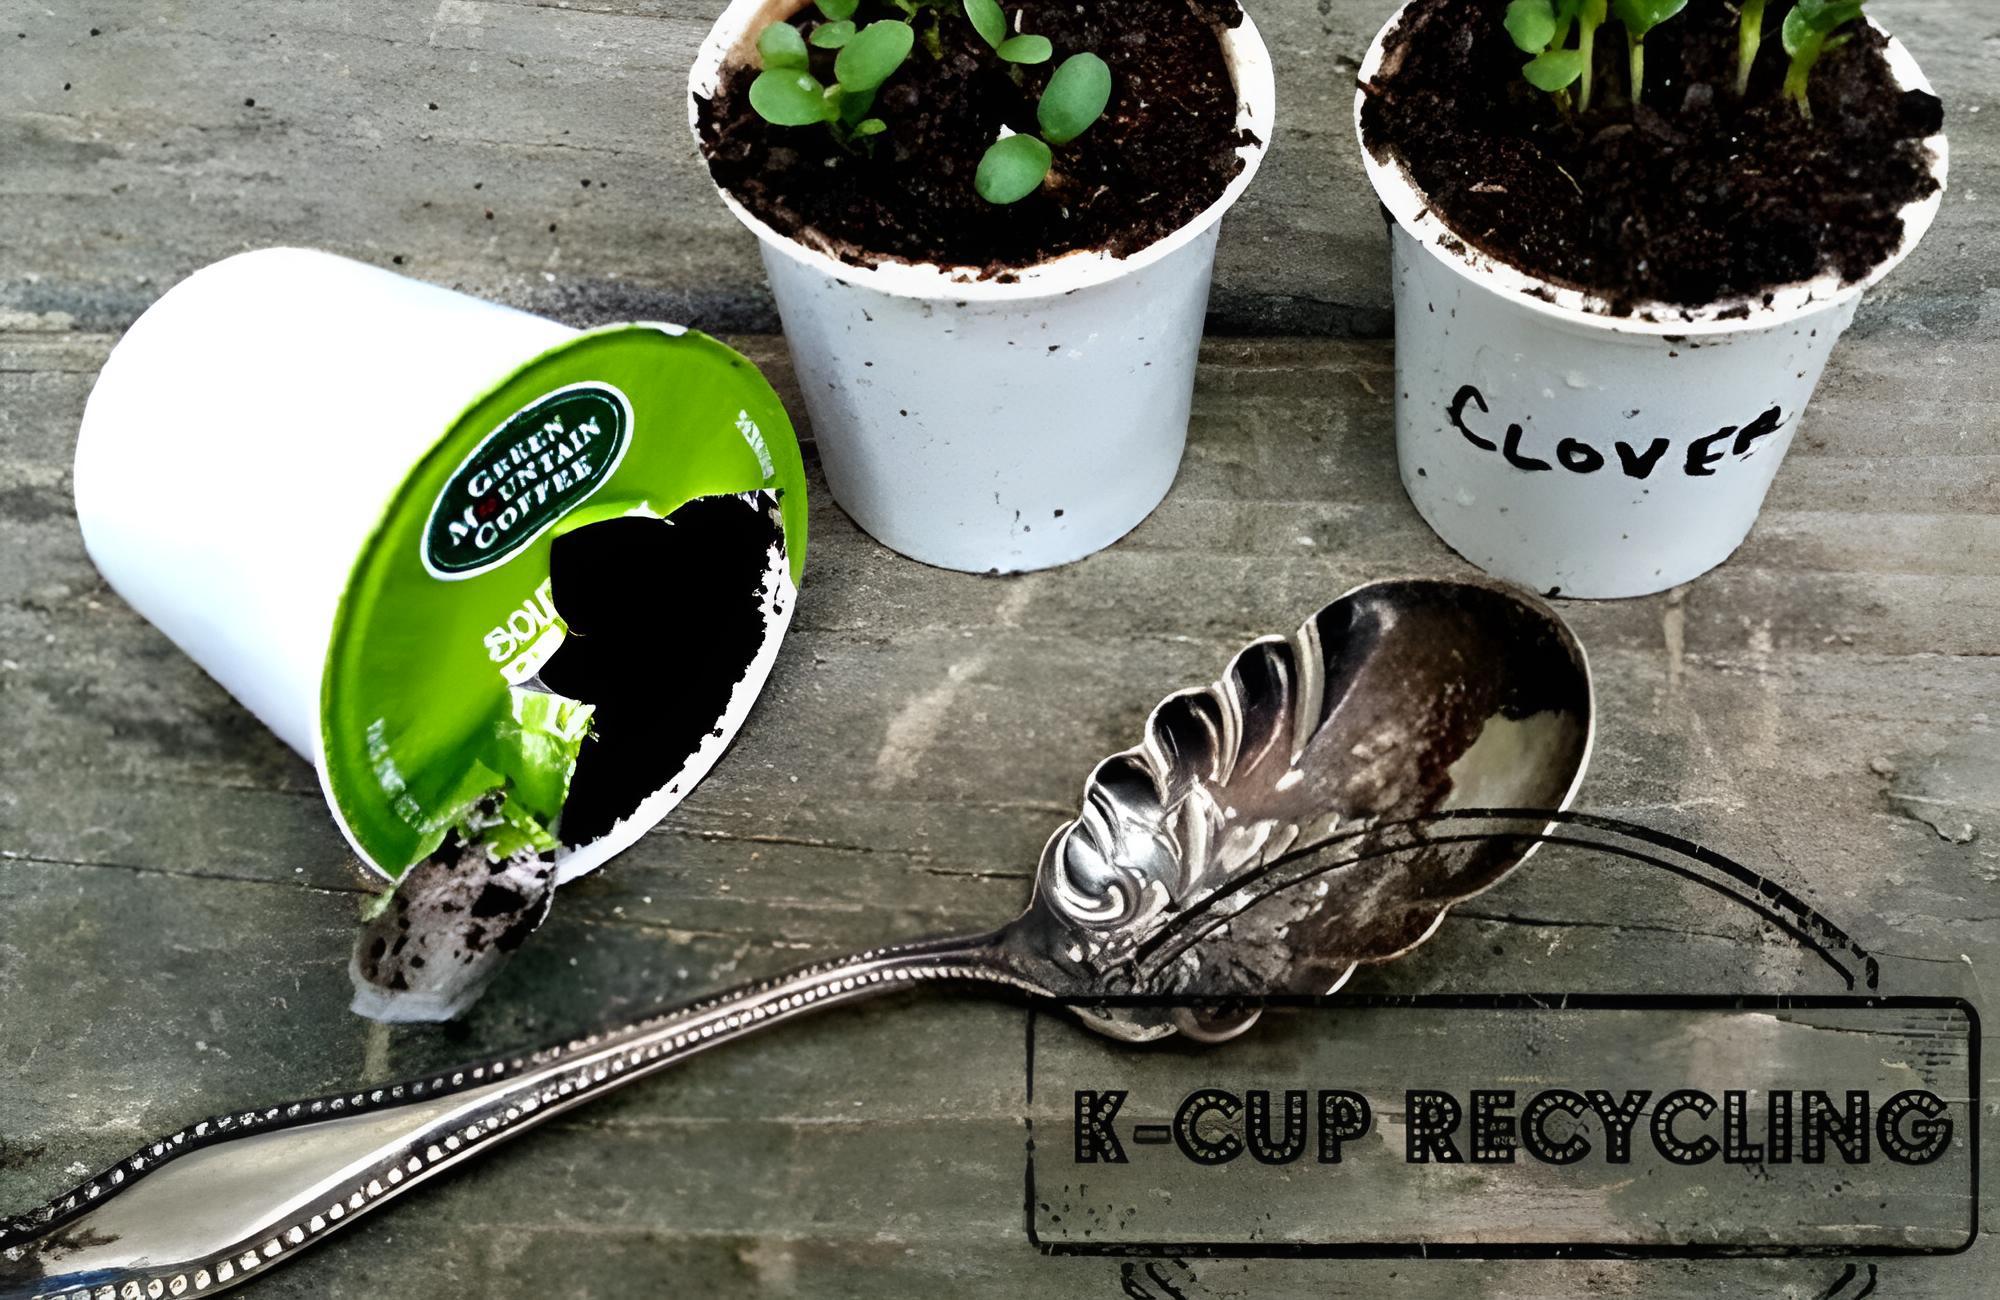
Use K-Cups As Seed Starters @hometalk / Pinterest
You can use old K-cups as seed starters. Take a flat, large-size container and place empty, clean, lid-less K-cups inside. Take your favorite potting soil, and place a scoop into each K-cup. Add two or three seeds per K-cup, cover them with soil, and wait for your plants to sprout.
70. Turn A Pallet Into A Planter
Materials Needed: Pallet
Cost to Make: $11-$13*
There are always a million and one DIY things you can do with an old pallet, and turning an old pallet into a planter is just one of many ideas. If you have a used pallet, repurpose it into a planter. You can use the whole pallet or cut it to size. If you cut it, you won’t have to buy extra boards for shelves.
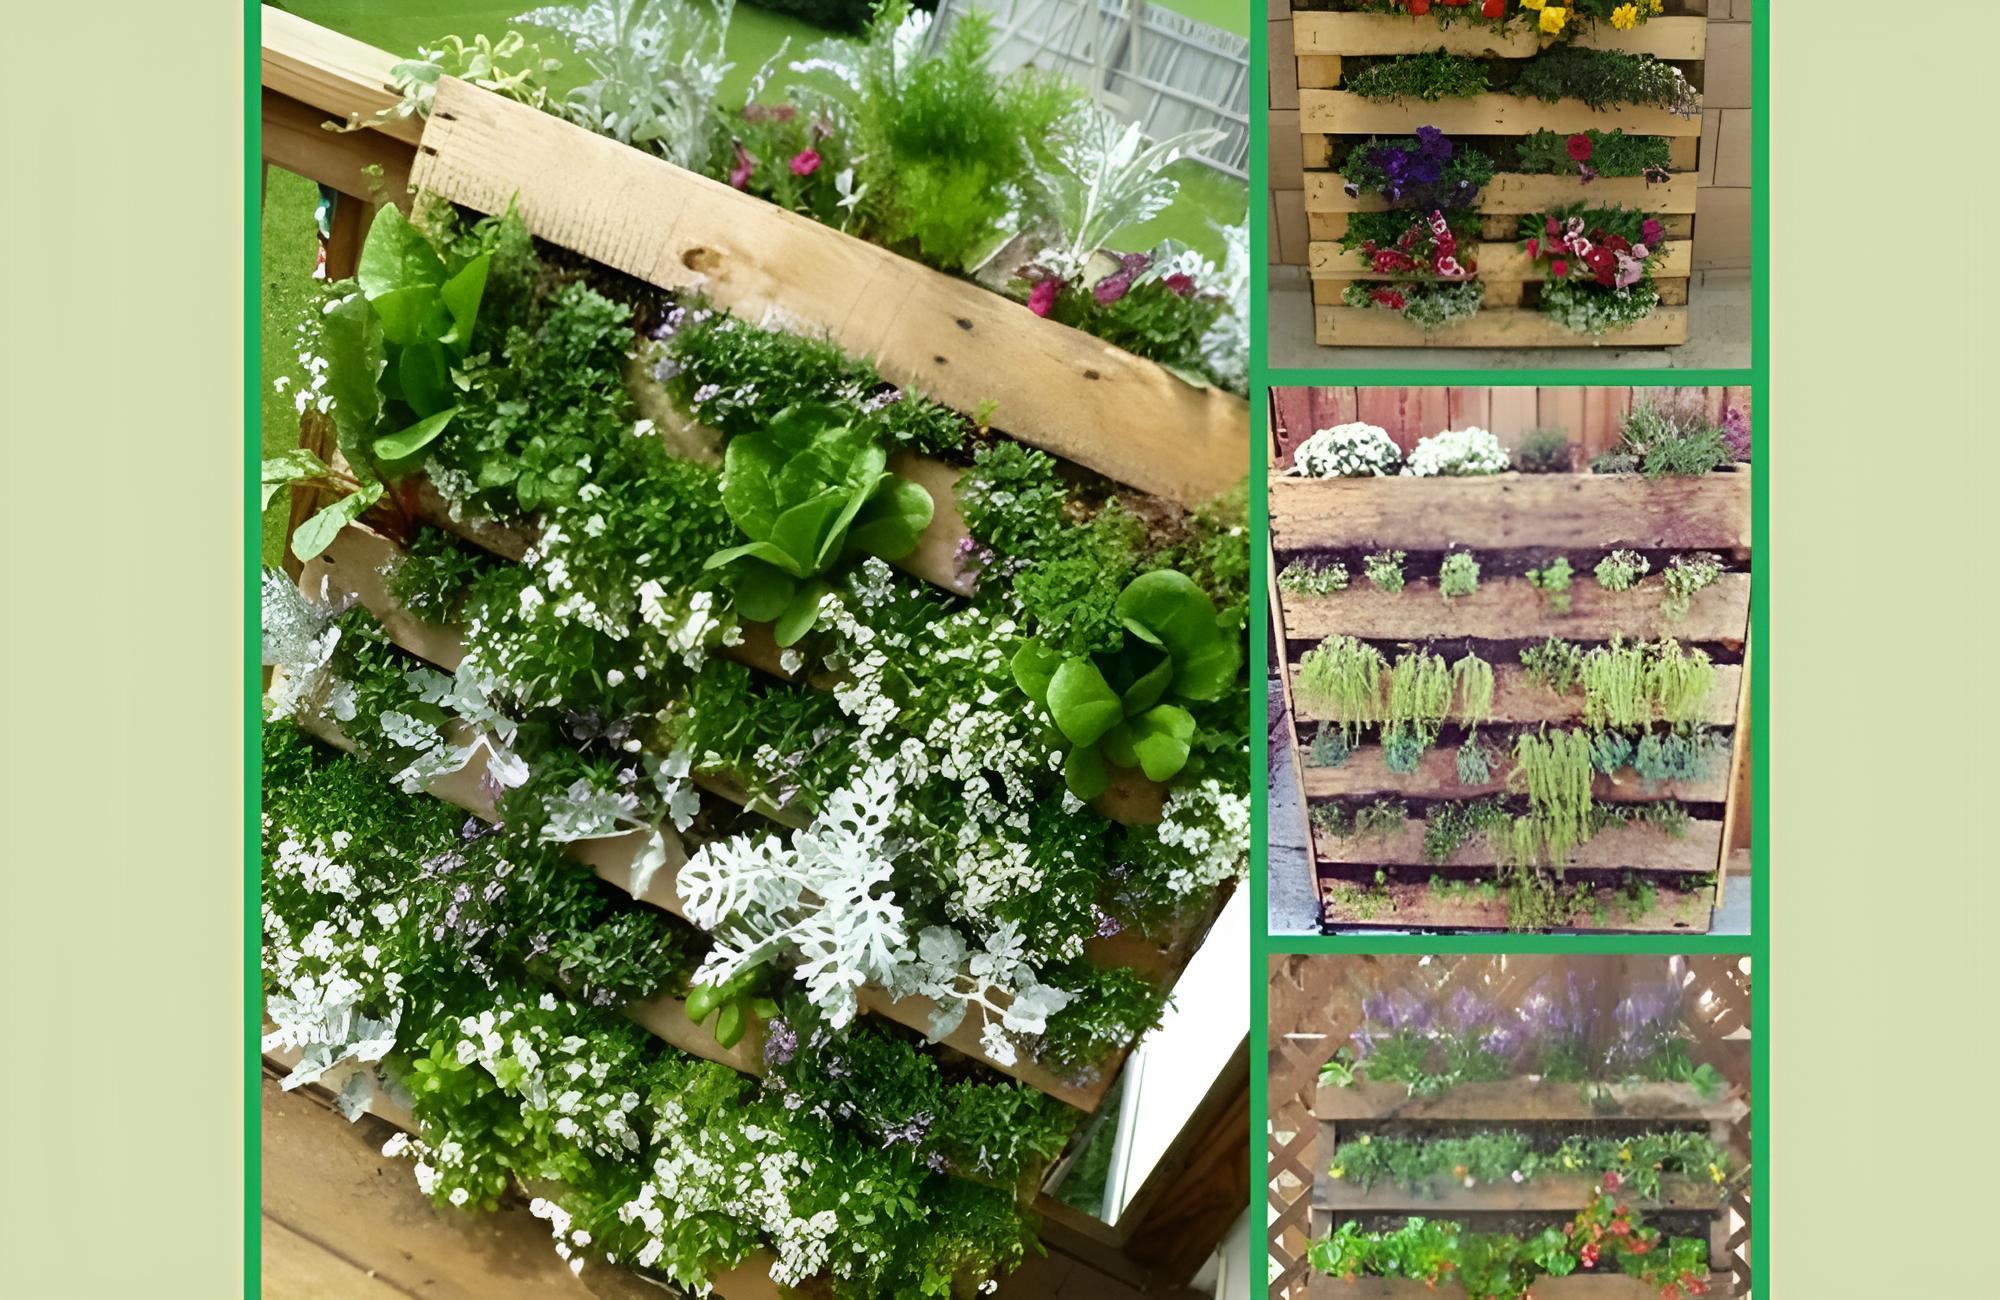
Turn A Pallet Into A Planter @indulgyworld / Pinterest
The vertical design is perfect for holding small pots. You likely won’t have to stain or paint the pallet, as the unpainted look is rugged and charming. If you’re placing the pallet planter in your home, make sure you clean it first.