
Made easily at home, dried plums—also known as prunes—are a nutritious and delicious snack. Packed with vitamins and fibre, they are ideal for both health advantages and gratifying your sweet taste. This guide will walk you through the easy procedures to create your own dried plums, so guaranteeing that you will always have a delicious treat on hand.
1. Choosing the Right Plums
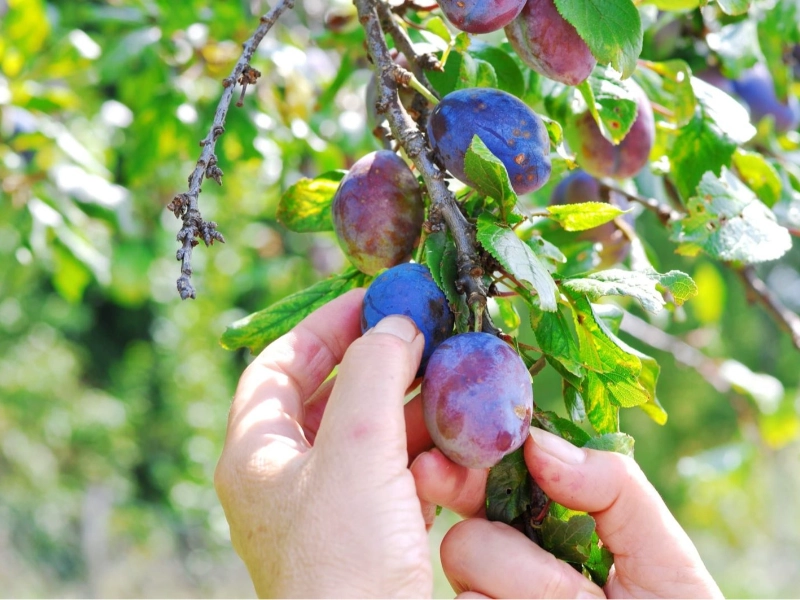
Choosing the correct kind of fresh plums is the first and most important step on the road to preparing dried plums, sometimes known as prunes. Not all plums are fit for drying; particular kinds produce superior in terms of taste, texture, and general quality. Perfect plums should be firm, ripe and free of blemishes, bruises, or any evidence of deterioration. Because of its higher sugar content and reduced moisture levels, variances such Santa Rosa or Italian plums are especially suited for drying. These qualities are quite crucial since they guarantee that the dried plums will have a chewy texture and a rich, sweet taste that is much sought for in a snack.
Examining the fresh plums, focus especially on their colour. Depending on the variation, ripe plums usually show vivid colours ranging from deep purple to yellowish-green. The firmness of the skin is an excellent gauge of maturity; gently pressed skin should yield somewhat without being too soft. This faint hint suggests the fruit is ready for drying and is matured. Avoid choosing any plums that are too soft or show dark spots; these would suggest that the fruit is either overripe or starting to rot.
After choosing your plums, you should wash them completely under running water to eliminate any chemicals, dirt, or residues on the skin. Making sure your dried plums are safe to eat and free of toxins depends on this stage. Before moving on, blot the plums dry with a fresh towel to eliminate extra moisture after washing. Choosing premium, fresh fruit for the best outcomes is absolutely crucial since the quality of the plums you choose will directly affect the flavour and texture of the finished product.
All things considered, choosing the appropriate plums is a basic stage in the process of producing dried plums. Selecting fresh, ripe, and blemish-free plums will help you to guarantee that the dried plums that result are not only good but also healthy. Recall that the taste and texture of the dried plums will be greatly influenced by the quality of the fruit you begin with; thus, it is well worth your time to choose the best possibilities. This first stage prepares the ground for making a delicious and filling snack with several possible ways of enjoyment.
2. Preparing the Plums for Drying
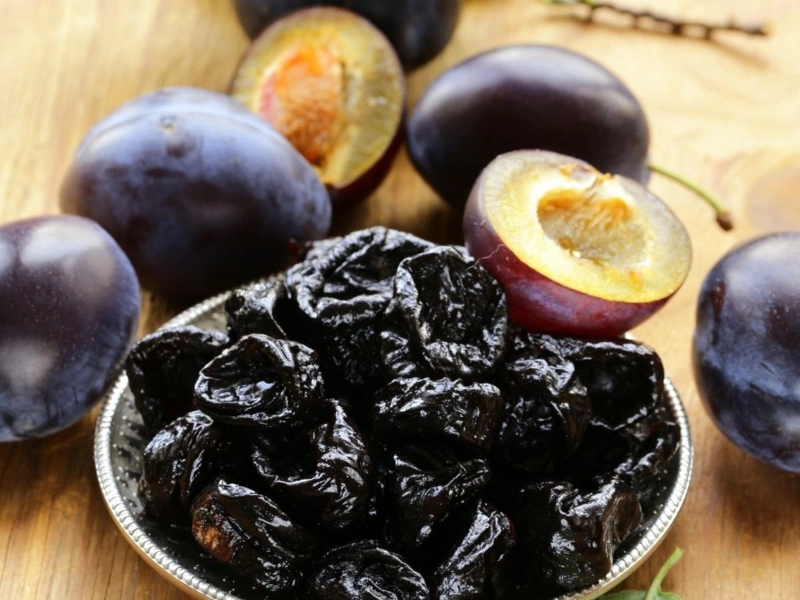
Making your plums ready for the drying process comes next after choosing and cleaning them. The plums must dry uniformly and retain their taste and texture, hence proper preparation is quite necessary. Elimining the pits from the plums comes first. Apart from being a choking risk, the pits can be rough and unpleasant for chewing. Just cut each plum in half along its natural seam, then softly twist the two pieces apart to remove the pits. The pit should come out readily, leaving two plum halves ready for drying.
You can leave the plum halves whole or split them into smaller pieces once the pits are gone. While cutting the plums into smaller pieces would hasten the drying process, it is imperative to guarantee consistent thickness to enable even drying. For slices and halves alike, a desirable thickness is roughly half an inch. This thickness enables the plums to dry completely without becoming too tough or chewy, therefore producing the desired end effect.
Soaking your plums in a concoction of water and lemon juice for roughly ten minutes is another beneficial step in getting ready. During drying, this soaking technique allows the plums to retain their taste and colour. Apart from improving the general taste of the dried plums, the acidity in the lemon juice keeps them from browning. Once soaking, rinse the plums quickly to eliminate any extra lemon juice; then, once more, pat them dry with a fresh towel. Making sure your finished product has the best possible taste and texture depends critically on properly chopping the plums.
It is noteworthy that the quality of the dried plums may be much influenced during the processing stage. A more fun snacking experience results from spending time to eliminate the pits, cut the plums to a consistent size, and soak them in lemon juice. As you proceed to the drying techniques, this meticulous preparation guarantees that your dried plums turn out great and fulfilling, thereby preparing you for success.